DIY Files: Free Father’s Day Printable Card

Looking for a last minute card for Dad? We’ve got you covered! This free printable Father’s Day card saves you a trip to the store and is ready with just a couple of clicks.

In the mad dash to wrap everything up for school, somehow once again, Father’s Day crept up on us. We don’t do major gifts for Father’s Day or Mother’s Day, but rather, we try to enjoy experiences together. To go along with these experiences, I try to get the kids to do a DIY craft or something or another. So, in honor of Father’s Day, I created this super simple free printable card. 

FathersDaycard

Quick Printable

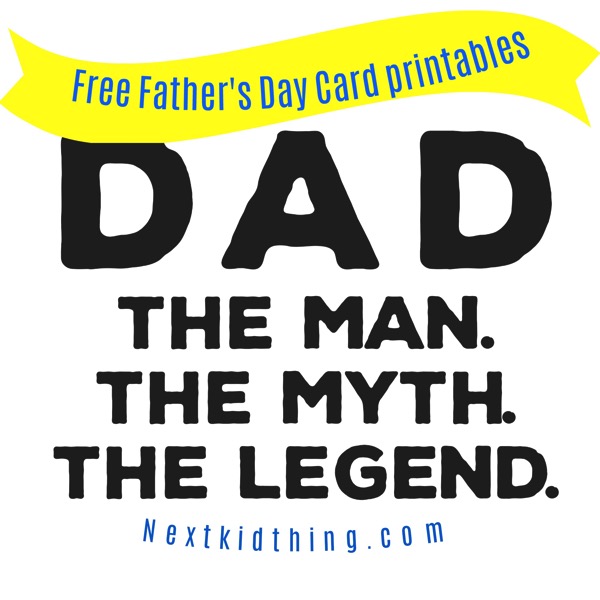
I have a pack of blank cards from Michael’s that I try to keep onhand. By the way, this pack of 50 blank cards from Recollections is a must-have in my craft arsenal. Handwritten notes are not dead, and it’s a quick and inexpensive way to send something truly personal. I bought this pack when it was on sale for just $4.99. People, that’s 10 cents a card! For the first file, I included this awesome Dad Legend file that I bought from Design Bundles. I love their work and use it for a lot of my crafting projects. I had to make these cards for myself, so I wanted to share the love with you guys! So, enjoy! If you download this file, please remember that this is for personal use only. This card file makes a 5x 6.5 card. After you print, just fold the card in half. The image will be on the front of the card. Just click the image below to head to the file.


DadtheMan


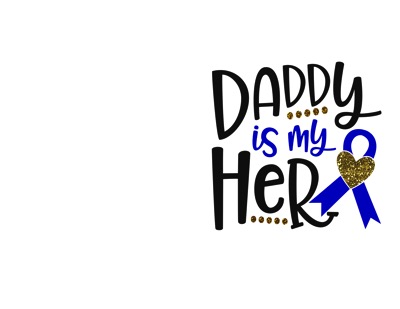
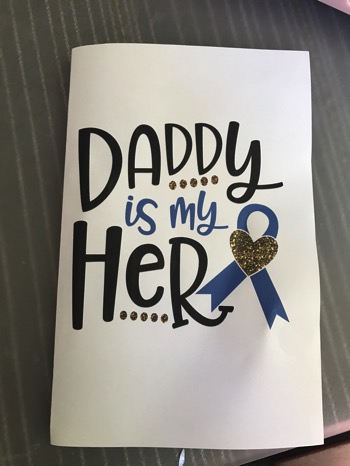
I created another quick card that can be printed out on a regular 8.5 x 11 sheet of paper. This graphic is also from Design Bundles and evokes a fun feel. My dad is definitely my hero, and I’m sure many of your kids feel the same about their dads! This file also appears flush right and will appear on the front of the card once it’s printed and folded in half. This file is for personal use only. Thanks for sharing and pinning these fun and free printables!

Daddyismyherocard

IMG 6196

Dad, the Man, the Myth, the Legend card can be found here.

Daddy is my hero card can be found here.


Best Gadgets from the 2018 New York Baby Show

Last week, the boys and I went to the New York Baby Show in NYC to check out the latest and greatest for babies and families. As one of my favorite events that covers the juvenile and baby market, I love getting a chance to spot the newest products and services at such an expansive venue.

In the past, I’ve loved spotting cool strollers and the big ticket items. This time around, I opted to go the goodie and gadget route. As it turns out, the New York Baby Show was loaded with goodies and gadgets that can help the whole parenting thing go a little smoother.

Here are just a handful of our favorites from the show:

Travel Tray

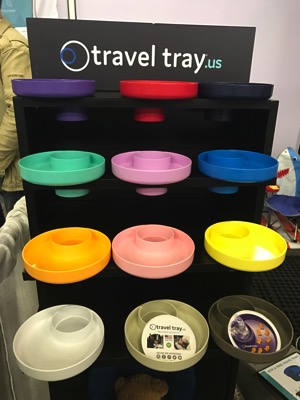
The Travel Tray is a really cool concept, and one I can’t believe hasn’t been invented yet. When we heard about this cool gadget from friends at the show, I
 had to check it out myself!

IMG 1939


The Travel Tray pops into any cup holder and becomes an instant tray to hold small snacks and food. I love that it comes in a variety of colors, is BPA, PVC and PHT-free. This cool gadget is great for the beach, sporting events, road trips and beyond.

Stuck on You Bento Box

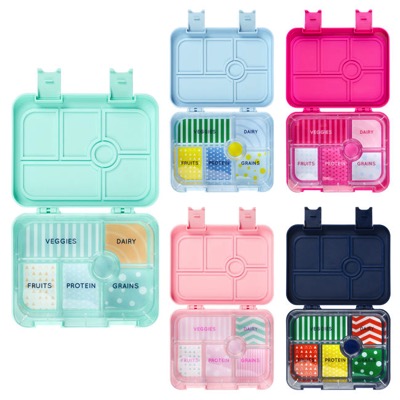
I’ve been into the bento box lunches even before I became a parent. Needless to say, I love bento boxes, which is why I was drawn to Stuck on You’s Bento Box.

Bento inside 5up 1000

This bento box has a cool feature that can be personalized on the front. The interior features labeled sections for each type of food. These compartments not only help with portion control, but also promote variety and keep everything from touching! Be sure to check out Stuck on You’s other cool products!

Baby Tripster

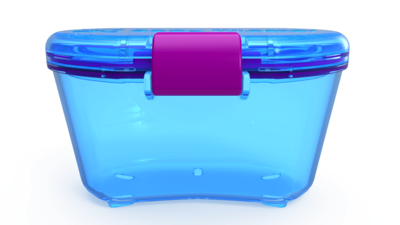
This cool container is great for baby food on the go, fresh veggies or fruit and all kinds of snacks. I love that it has a gasket to ensure that it stays sealed. It’s small enough to pop into the diaper bag or cooler bag. It’s these cool new gadgets that make parenting so much easier. 

Baby Tripster Blue View 1 grande 2048x2048 20752638 6a2c 4016 aa53 edc474ee0ced 720x

And, when we weren’t scouting out all the new finds on the showroom floor, we had a great time catching up with friends in the Blogger Lounge. The Blogger Lounge had a lovely lunch provided by Boston Market. I don’t get to eat out at Boston Market that often, but when I do, I’m always reminded how it’s such a filling family meal. As I chatted with friends, the boys had a great time playing in the play area—even the bigger dude!

Once again, we had a great time exploring the New York Baby Show. After taking all the photos and shooting video along the way, the best part is always seeing how baby products continue to evolve, and now, my babies, who were the inspiration for this site, are helping me find and share cool new products.


Full disclosure: this post is sponsored, but as always, all opinions on NKT are my own. Thank you for supporting NKT.  

Royal Wedding Crafts: DIY Fascinator for Kids

The Royal Wedding of Harry and Meghan Markle is upon us, and amidst all the solemn happenings in the world today, this real-life fairy tale is a welcomed diversion.

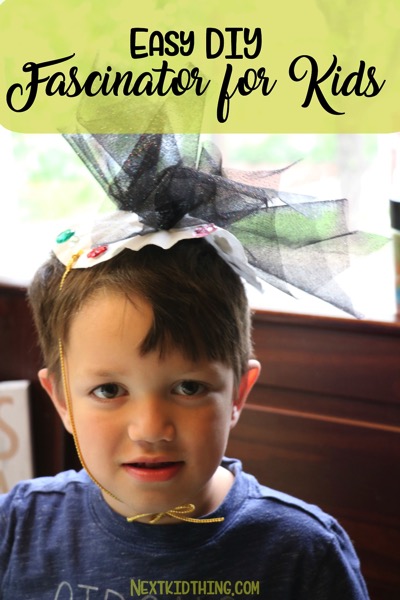
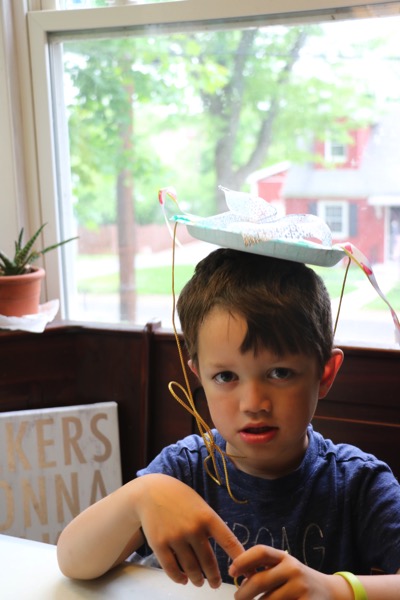
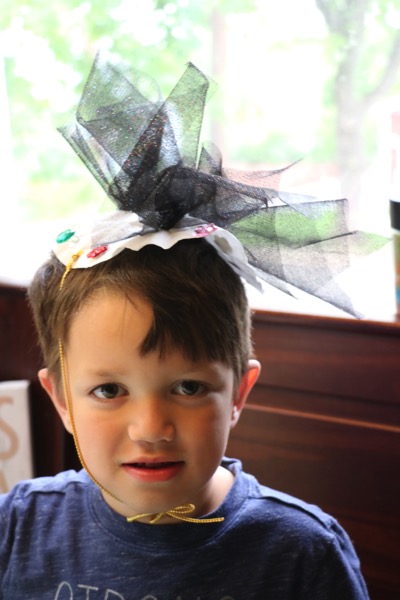
 In honor of the wedding, we came up with a quick, easy and fun DIY fascinator for kids. We wanted to be dressed for the occasion, even if we’ll be in PJs.  

DIYFascinator


Fascinators are fabulous accessories that are not quite a hat, but more a clip with fancy flair. Fascinators date back to the Renaissance and were typically worn by women. These accessories are often adorned with feathers, netting, tulle and other exquisite textiles. Hats and fascinators are staples at the Royal Wedding, so we wanted to dress the part at home. Josh is aware that fascinators are for ladies, but he obliged me with this fun project.

Supplies 

And because we’re fancy, we’ve created fascinators with supplies that we already had at home. No trip to the milliner for these fancy accessories!

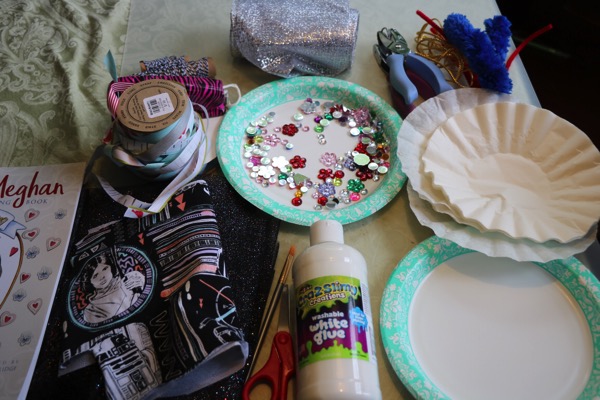
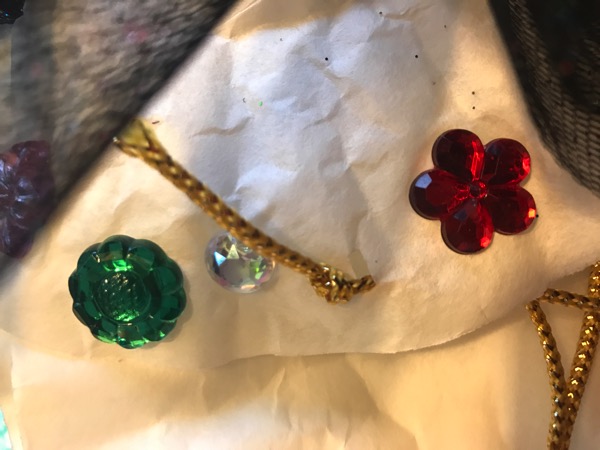
For supplies, you’ll need a round base, either a small plate or coffee filters. The rest of the supplies should be what you’ll decorate your fascinator with: tulle, fabric, jewels, stickers. You should also have a pair of scissors, glue, hole puncher and ribbon or string.


IMG 1893


There’s no right or wrong way to create your fascinator. Josh went the paper plate route, while I went the coffee filter route. The paper plate was a bit harder to work with since it doesn’t conform a well to your head. 


IMG 1886


IMG 1884


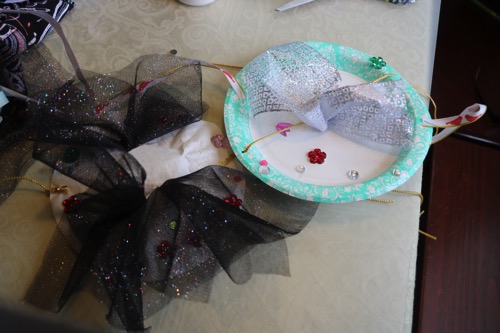
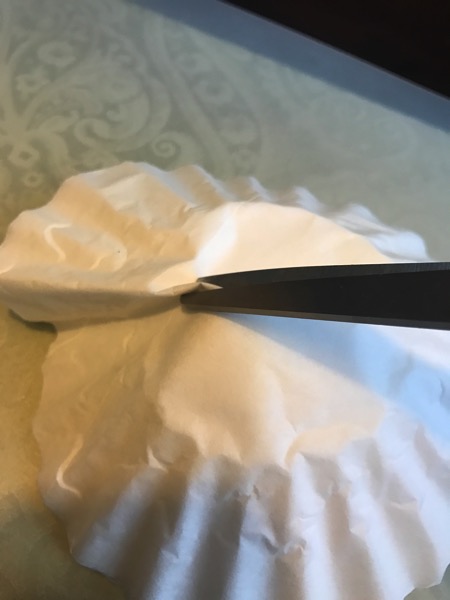
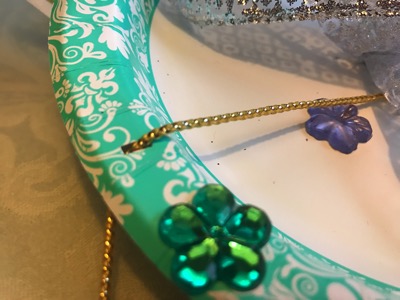
I chose the coffee filter since it was light and easy to decorate. Before decorating the fascinator, you should make the holes on either side of the plate or coffee filter. These holes should be directly across from each other and somewhat even. This is where the ribbon or string will go.


IMG 1902


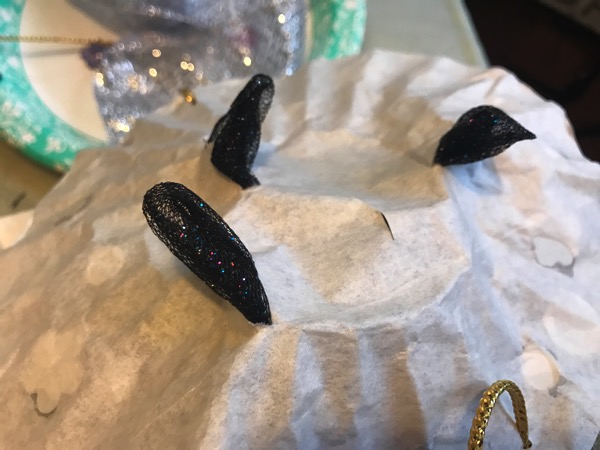
Next, take the scissor and make several smaller slits, big enough to poke fabric ro tull through, but small enough so that it can’t fully fit. After you’ve made the slits, just tuck the tulle into the slits. Tulle was the best to work with since it’s light, yet stiff. Once the tulle is positioned to how you like it, it’s time to bedazzle and decorate.

IMG 1904


Josh wanted some ribbons, I wanted more gems. Go to town until the fascinator is as basic or extra as you wish! This craft is meant to be easy enough for little kids to do, so there’s no need to make it more complicated than it has to be; trust me, I’m good at complicating crafts!


IMG 1903

IMG 1906

Once things are in place, it’s time to feed the ribbons through the holes. Once you feed the ribbon through the holes, tie it into a knot on both sides. Once you complete the finishing touches, try on the fascinator. Many people choose to wear their fascinators on a tilt on the side of their head. It’s your fascinator, so you choose! And there you have it! You can dress up for the royal wedding with your unique fascinator in just minutes!


IMG 1875


I’m especially excited for this wedding because I’ve always admired Harry’s candor and the way the couple are both champions for charitable causes. I love what Meghan symbolizes; she’s an American actress who has paved her way with her intelligence and style, and who happens to be biracial. We can’t wait to watch the wedding!

If you check out the wedding, don’t forget to check out all the great hats and fascinators!

Key Takeaways from Mom 2.0

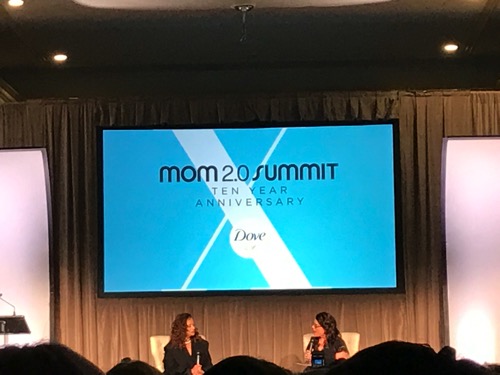
Last week, I attended my second Mom 2.0 at the Langham in Pasadena, California and learned so much. For those who aren’t familiar, Mom 2.0 is a conference for content creators, many of whom are moms and parents. I don’t always talk about the conferences that I attend to network and sharpen skills, but I definitely wanted to share with friends who may be interested in some of the things that I learned.


While I’m still digesting the plethora of information and various content creation tactics, I wanted to share just a few of the key takeaways from the tenth anniversary of Mom 2.0.
 

IMG 0843

I’ve clocked several years in the blogging world, so finding a conference that’s a good fit and a worthy investment for my business and requisite social media endeavors can be quite the feat. It’s truly a monetary and time investment to attend a conference, especially one that’s across the country. Thankfully, Mom 2.0 is such a comprehensive conference for our industry, and I came away with a good deal of information and motivation that I plan to employ ASAP.


Instagram Growth and Authenticity

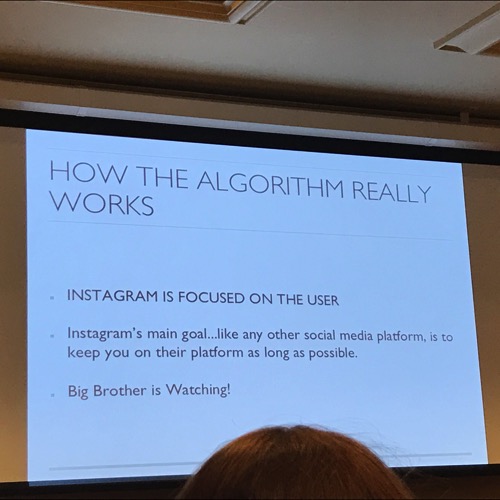
Like all the other social media outlets, Instagram is always evolving. I’ll have more to share on the topic, but one of the things that I learned in the Instagram algorithm session is that everything you do on Instagram matters in terms of growth and engagement. Like, comment and interact with content on your niche.


IMG 0763

Finding Your Growth Through Podcasting

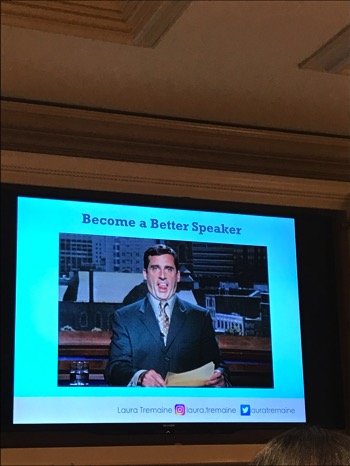
According to this session, I learned that over 48 million people listen to podcasts at least once a week. I’m a relative newbie when it comes to religiously listening to podcasts. I’ve been listening to several podcasts over the past few months now, so it was great to sit in on the session that discussed podcasting. The most memorable quote from this session: What you can share in black and white with your writing, you can share in Technicolor with your voice. Those are some words to consider.
 

IMG 0782


Organize with Content Editorial Calendars

In the mini sessions, I sat in on a chat about editorial calendars. As a former magazine editor, I’m no stranger to editorial calendars. As a freelancer and blogger, I’ve found that I can be my own worst enemy when it comes to staying organized and producing timely content. In this session, I learned different ways of categorizing and cataloguing content for your editorial calendar. There are apps, to help you stay organize and to hold yourself accountable.


DIY with Intent

I do a lot of DIY at home, but I don’t always create content to share about it. It’s weird, I’m a major DIYer, but I don’t always think to write about it. I sat in on this session about creating DIY content, and learned that it’s important to create strong content with branding that represents you. Hopefully, I can follow through with this and share more DIY tutorials and projects in line with The Next Kid Thing.


Sisterhood is Important

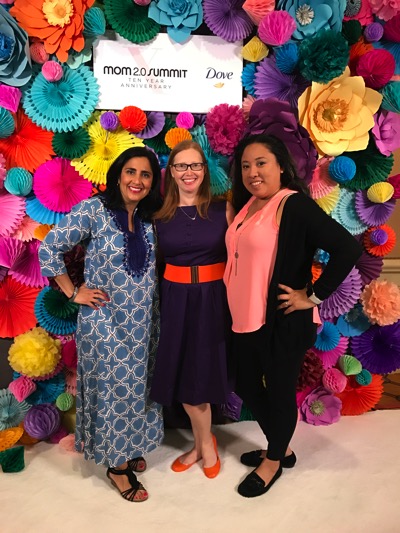
I have to admit, I’m at a very tricky phase in life at the moment. We have had some major life changes in 2018, much of which made me realize for my own health and sanity that it was important filter our relationships that made me question my self-worth—you know the ones. Spending so much time with like-minded creatives and business owners provided the reminders that as much as I need to cultivate and curate relationships, just like I would my content. These real, authentic relationships provide the foundation for a healthy outlook on professional endeavors.
 

IMG 0835

Brené Brown is Awesome 

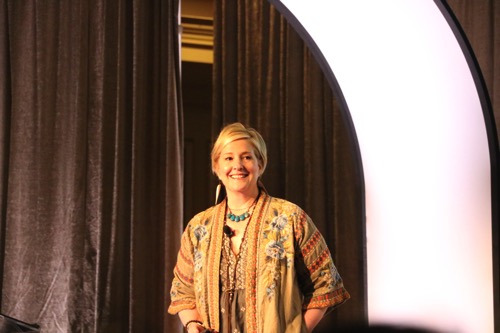
Based on some suggestions and what others have been saying, I fell hardcore for Brené Brown. She’s the writer and motivator that I needed to help inspire me through some adversities. I devoured her books on Audible, sometimes multiple times. So, when I heard that Brené was one of the keynote speakers, I knew that I made the right decision to attend Mom 2.0 for my second time. Arriving 35 minutes before her scheduled keynote, I snagged a seat right upfront so that I could take photos and absorb her talk. I loved learning that she has so a sweet connection to the conference and knows quite a few people who have been part of the community for a long time. 
IMG 0980


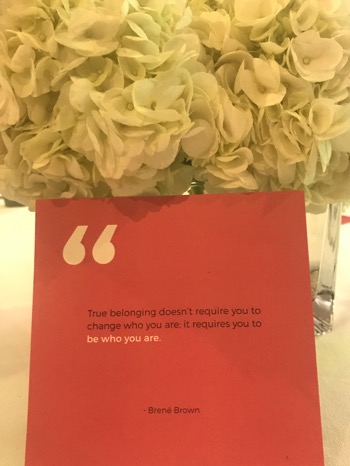
As usual, Brené’s words spoke to me and lifted me even higher to a place that I desperately craved to find. I wrote so many notes and took a billion photos during her talk, but if I was to pinpoint just one idea that she shared, this would be it: 

Vulnerability is not about winning or losing, it’s about choosing to be seen when we have no control over the outcome.
 

IMG 0970


Yes, yes, yes!


Did you make it to Mom 2.0 2018 in Pasadena? I’d love to hear your thoughts!
Hollywood Darlings Q&A and Meet and Greet in NJ

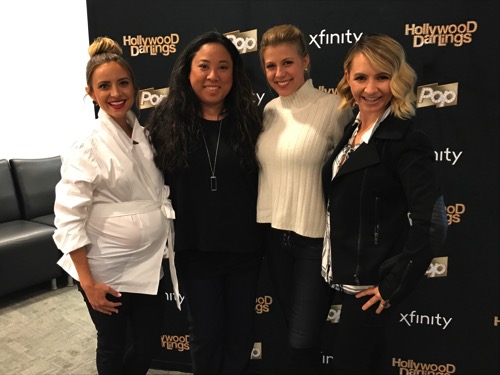
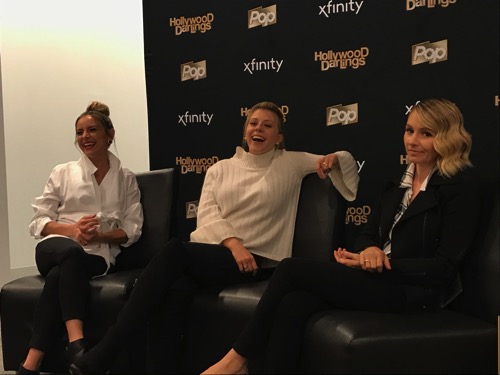
Last week, I had the pleasure of attending a fun meet and greet with the stars of PopTV’s Hollywood Darlings. The super funny cast of Hollywood Darlings was onhand at the West Orange, NJ Xfinity store to meet fans, take photos and chat with fellow bloggers and me. The lovely Jodie Sweetin (Full House), Beverley Mitchell (7th Heaven) and Christine Lakin (Step By Step) were so gracious to answer a handful of questions for us. These ladies were all so engaging and hysterical, and  relatable moms. Their fun personalities shined just as they do in their show!

HollywoodDarlings1

I was one of the first ones to ask a question. And while I could’ve asked anything, I chose to ask the ladies about social media and authenticity. I asked them what their thoughts are on keeping it real on social media. In the day and age where so many stars and influencers are faking it to make it online, how do they stay transparent for their audience? Jodie Sweetin, tackled this topic with such poise. In essence, Sweetin told us that what you see is what you get. She is a casual kind of person, so she often posts realistic photos of herself online. The other two stars chimed in and said at the end of the day, they’re all moms who get it.

hollywooddarlings2

With so many kids and adults who admire them, I’m so glad they grasp the importance of authenticity and transparency.

While we could’ve chatted for hours, I totally enjoyed listening to Sweetin, Mitchell and Lakin share their thoughts on the show and how it came about. I’ll have a video to share on YT soon, so keep an eye out for that!

As part of this fun event, we were treated to mini makeovers with the Glam Squad, as well as a cool photo booth! So fun and glam! Thanks for the fun treat.

IMG 8871

Hollywood Darlings is a hilarious show that’s classified as an Improv Comedy. It’s not a full-on reality show, but a fun comedy that follows these three talented actors. Hollywood Darlings airs on Wednesdays at 8p.m. on PopTV. Check your listings for channels.


Full disclosure: this is a sponsored post as part of the RoleMommy Writer Network. As always, all opinions on NKT are my own. Thanks for supporting NKT.


Hollywood Darlings to Host Fan Meet and Greet in West Orange, NJ

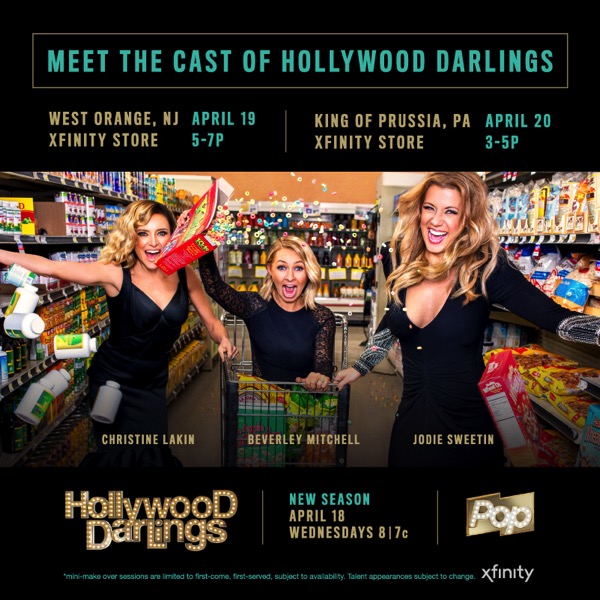
My inner teen is so excited for this upcoming event promoting the second season of Hollywood Darlings. Next week on Thursday, April 19, the cast of PopTv’s Hollywood Darlings will be at the West Orange Xfinity Store at 495 Prospect Ave Suite 509. Jodie Sweetin of Full House, Beverley Mitchell of 7th Heaven and Christine Lakin of Step by Step will be hosting a special fan meet and greet and mini makeover sessions in celebration of the season two premiere of their show airing on Wednesdays April 18 at 8pm.

HWDs2 affiliatesTour 800x800 bothLocations

This sounds like a fun event here in North Jersey, so if you’re in the area, definitely head to the West Orange Xfinity Store for this unique meet and greet. If you’re close to King of Prussia, be sure to head to the Xfinity Store  in KoP on April 20.

I’ll have more to share soon, but for now, check out this fun video:

Full disclosure: This is a sponsored post. As always, opinions on NKT are my own. Thank you for supporting The Next Kid Thing.

New York Baby Show Set for May 19 & 20 + Ticket Giveaway

Happy Spring, friends! It’s that wonderful time of year that’s filled with renewals and rebirth. And when you cover baby and kid goodies, it also means lots of fun baby shows in NYC! For the past few years, I’ve enjoyed attending and covering the New York Baby Show highlighting the latest and greatest new baby gear and goodies. This year, we’re headed there once again!

NYBS2018 MomTrends blog post 4 700x1000

2018 New York Baby Show, on May 19 & 20 at Pier 94 will once again be the largest show for new and expectant parents in the country. Now in its 8th year, no other event provides a better experience for thousands of expectant and new families from New York and neighboring counties, seeking a family-friendly jamboree of top brands, great speakers and seminars, big giveaways, and lots of learning, support, bonding, and fun as you make your way into parenthood. We are giving away tickets for you and your family to experience the show. Normal ticket price is $30 per family (for 2 adults and up to 4 children), and $20 per individual. 


Ticket Giveaway 

We have 10 free tickets (family or single) to giveaway. Head to this link to grab your tickets!

Once the free tickets are gone, we have unlimited ticket discounts to the New York Baby Show. 
  • Enjoy 50% off any tickets (family or single)
  • Get 50% off tickets to the New York Baby Show here

Full disclosure: This is a sponsored post. As always, opinions on NKT are my own. Thanks for supporting NKT.


DIY Irish Blessing Canvas

St. Patrick’s Day is such a beloved holiday in our area. The prominence of Irish culture is emphasized with so much in mid-March. In honor of that, I wanted to create a festive canvas as a nod to all of the St. Patrick’s Day festivities.

IMG 4480

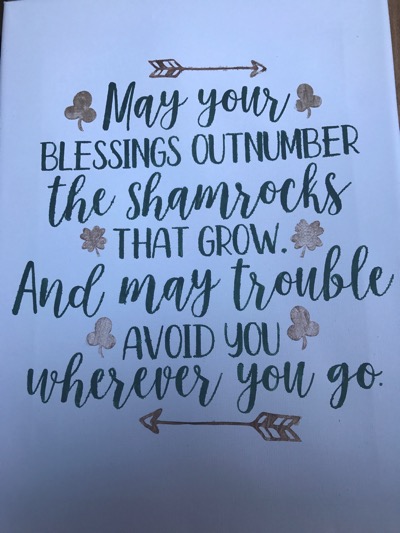
I absolutely love Irish blessings. There’s a beautiful saying that’s appropriate for everyone. For this canvas, I chose a simple but true blessing that would be applicable to almost anyone.

May Your

Blessings Outnumber

the Shamrocks

That Grow.

And May Trouble Avoid You Wherever You Go

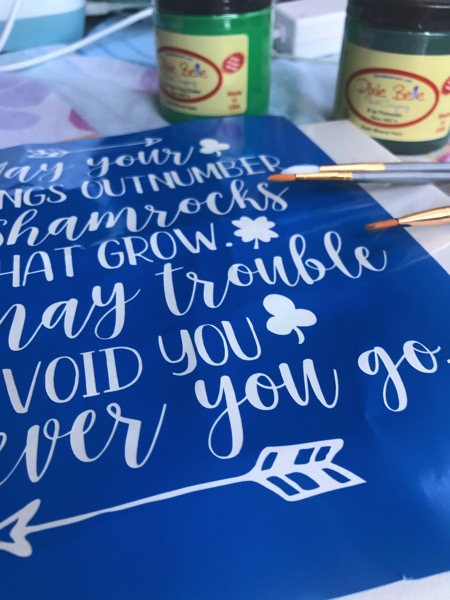
For this canvas, I created a stencil with vinyl and cut it with my Cricut. Weeding the stencil, and ensuring I caught every single period and detail was probably the most laborious part of this project.

Once it was all weeded, I transferred the vinyl stencil carefully to the 8.5 x 11 canvas. This part was more tedious than anything else. The transfer tape that I used was a little too strong, so I struggled a bit. I would definitely recommend using a lighter tack transfer tape to get everything onto the canvas seamlessly. Be sure to burnish the vinyl very well to avoid any possible leaks or bleeds.

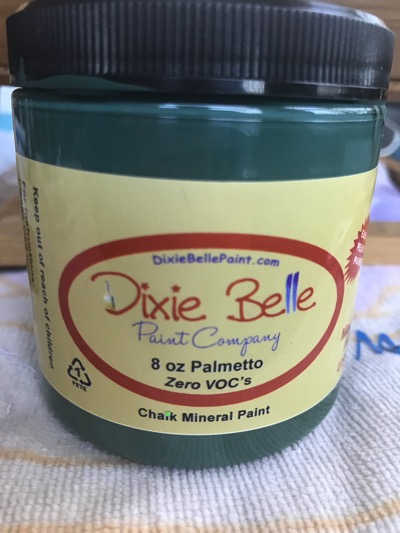
Once you’ve burnished the vinyl onto the canvas, select your colors and brush. I chose Dixie Belle’s Palmetto which is a beautiful deep, yet subtle green.

IMG 1107 A palmetto is a fan palm tree, which is prominent in the southern U.S. And since we have our fourth Nor’Easter upon the horizon, making this feel like the longest winter ever, I have visions of warmth, sunshine and palm trees. 
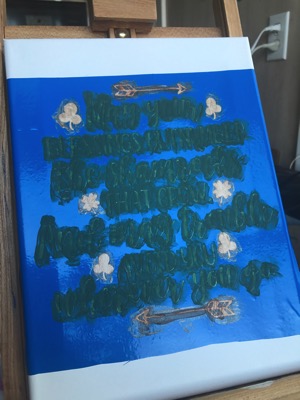
 

Palmetto was the perfect green for this canvas. I wanted the quote to be accented by gold, and to showcase the visual contrast in the fonts. Once I aligned the stencil, I took a smaller brush to lightly paint in the letters and shamrocks. For projects like this, less is always more. With each stroke, the shade gets a bit deeper, but be careful with overdoing the paint distribution. If you add globs at a time, the pain is more likely to bleed through the stencil and look sloppy. Small, light strokes works best for this canvas.

IMG 5527

Since Dixie Belle’s paints dry with ease, just keep an eye on the canvas. I usually take the stencil off before the paint completely dries. When taking off the stencil, go slowly, just to ensure you don’t drip or create streaks with the semi-dry paint. It doesn’t take Dixie Belle paint to dry, so I was finished with this project in under 2 hours. I love how it turned out, and it’s definitely something I can keep up well beyond St. Patrick’s Day.


IMG 2467


Second Season of Timeless on NBC Features History, Action and Adventure

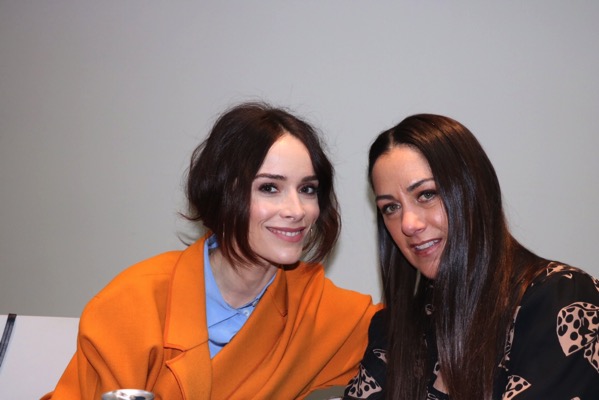
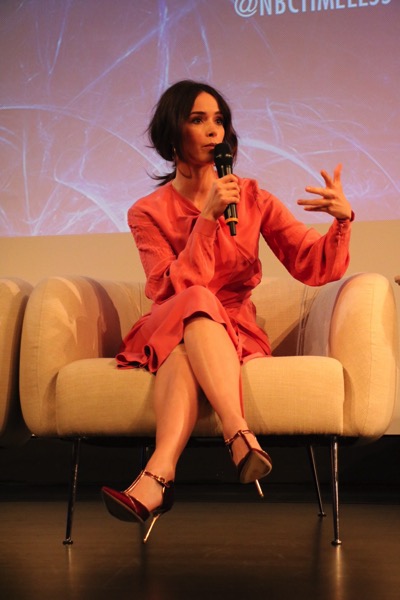
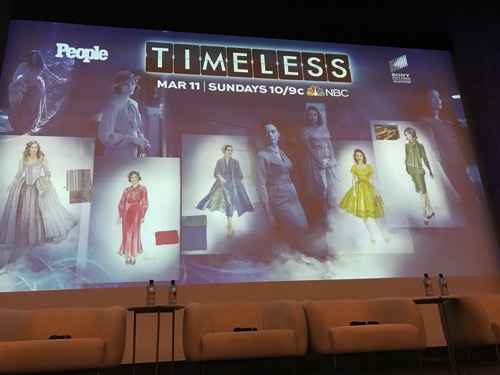
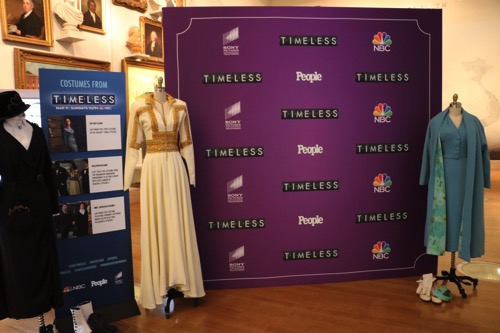
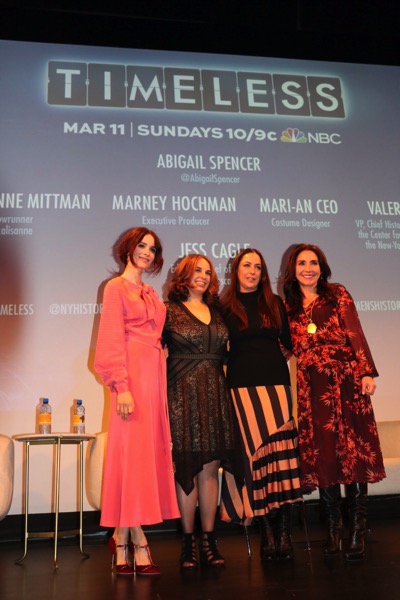
When it comes to strong female leads, NBC has a knack for showcasing the best of them. Ahead of its second season premiere on March 11, Timeless held a premiere event this week at the New York Historical Society in NYC. A nod to the prominence of history throughout the show, the New York Historical Society was a great fit for this event and celebration for Timeless’ second season. Thumbnail large Timeless’ premise combines action and adventure, which makes for an exciting science-fi and educational show. The ensemble cast stars Abigail Spencer as Lucy Preston, Matt Lanter as Wyatt Logan and Malcolm Barrett as Rufus Carlin as they endure challenges to help stop Rittenhouse from changing the course of American history. IMG 8868 In honor of the second season premiere, I was invited to participate in a roundtable Q&A with Abigail Spencer; costume designer, Mari-An Ceo; and Executive Producers, Marney Hochman and Arika Lisanne Mittmann.  In line with Women’s History Month and Lucy Preston’s fearless persona, the topic of powerful women came up quite a bit during our Q&A. Spencer elaborated on how Lucy’s most powerful asset is her brain: “I think we are really intentional with Lucy on Timeless in how she looks and we are careful not to sexualize her. She’s beautiful, but she’s brilliant. The producers pitched it to me that way: her superpower is her brain. I wanted her to start out that way. I wanted her to feel very normal so when she’s having to do these extraordinary things.” IMG 8836 Timeless includes unique stories and historical events, where the research and details contribute to the authenticity. With time traveling, the clothes and accessories contribute to the charm of Timeless. The costumes are so well-planned, that even the undergarments match the time period.  When asked about her favorite time period, costume designer, Mari-An Ceo said: “All of them; how do we learn about women. I have that amazing experience, to go in, read a script, and have to quickly go in and learn about that era. I may know that part of history, but then when you get into these scripts you really have to know where the hemline is. It’s so fun.” IMG 8592 We had the chance to check out the details in the costumes, which showed just how intricate and detailed the costumes are in Timeless. IMG 8872 In the second season of Timeless, Lucy and her team head on even more adventures to help save the world. In the first episode of this season, Lucy finds herself trying to save the world, not knowing the outcome of her last dilemma. Lucy heads off to World War I, alongside of her mom and sister, where they have to save a soldier. During their mission, they encounter Marie Curie and her daughter, Irene. Lucy uses her instincts to help unravel the deceptive Rittenhouse mission, all while learning from Marie Curie and her technology. The second season of Timeless is especially significant since the show was briefly cancelled. When asked how it feels to be back, Spencer explained: “I feel grateful for being given another go at it and we are so grateful to the fans it was really their love and their rabid appetite for the show. So when you come at it with that attitude, it’s nice.  You see that this is the real test of the show. I would say for us to do it again people are not going to watch the show and we’d love to do it again for sure. I think this season is better.” IMG 8823 After interviewing Abigail Spencer, Mari-An Ceo and executive producers, Marney Hochman and Arika Lisanne Mittmann, my interested was officially piqued. After watching the first episode of the second season of Timeless, I am officially hooked on this show that celebrates women, diversity and history, while encouraging the power of knowledge, STEM and strength in team work. If you enjoy history, adventure and unique stories, be sure to catch Timeless on NBC on Sunday at 10pm!

Full disclosure: This post was sponsored by the Role Mommy Writer’s Network.  All opinions are 100% my own

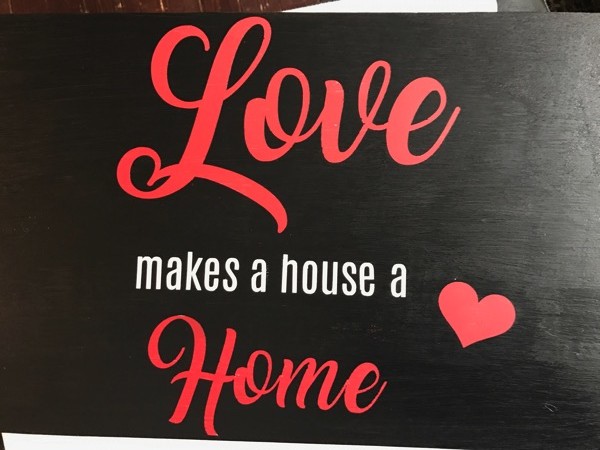
Love Makes a House a Home: Painting Upcycled Wood Signs

For Valentine’s Day, I wanted to create a sign and gift that would be relevant all year long. So, I designed a sign with a quote that I’ve seen floating around in various capacities.

LoveMakesahousea home

How true is that? And how relevant is this for this time of year, where love is the emphasis, but should truly be the emphasis all year long.

I created the text and image in PicMonkey and then used Cricut’s Design Space to apply my design and create my template.

IMG 6305

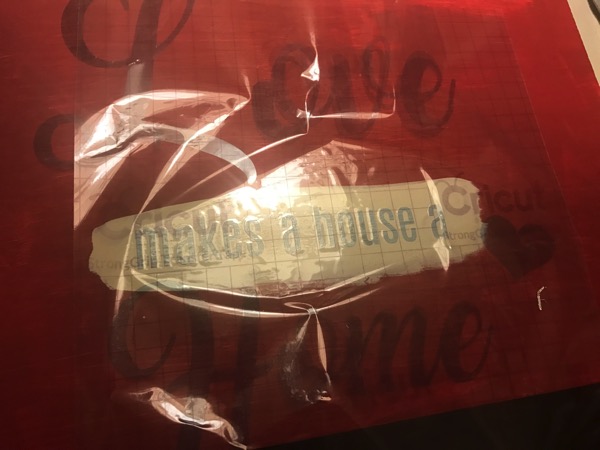
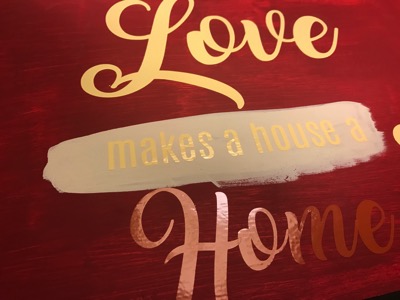
Before I did any painting, I prepped my upcycled wood. I sanded it a bit and then made sure it was clean of any debris. I then measured and painted where I wanted the different colored words to be. So, I used Dixie Belle Paint’s DropCloth for the white-ish secondary text and Barn Red for the Love and heart images.

IMG 6308 2

I love that you don’t need much paint when using Dixie Belle paints. I did several smooth strokes of each color, which was probably 2 coats in all.

Once it dried, I applied the vinyl template. I did the positive part of the template, meaning I applied the actual words, and then I will peel off later to reveal the color beneath. I prefer using Cricut for my template because I know it will stay. This step can be the most laborious and tedious part, but I promise, the end result is so worth it. When applying the template, be sure to lay it as flat as possible to avoid any air bubbles. Air bubbles can lead to bleeds and gloppy messes.

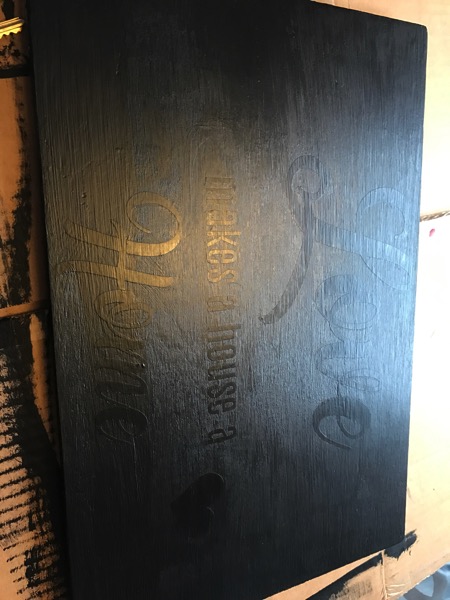
When the template is applied, go ahead and paint over everything with the color you choose for the base color. This color will be the main color of the sign, so be sure it contrasts enough without overpowering the underlaying colors. I chose a basic black chalkboard paint, so I can draw or write on it later with chalk.

IMG 6334

Paint 1-2 coats of paint, making it as smooth as you can. Alternatively, since the rustic look is in, don’t feel like it has to be perfect so you can adjust it later. Once everything is just about dry, locate the letters and take a pointy tool to start lifting the letters. I do this step slowly before it’s completely dry so that it has some give. Sometimes when it’s totally dry, it can be solidified, making it difficult to release the underlying letters.

LoveMakesa-House-a-HomeIMG_6337.JPG

Once you peel off the letters, you should see the underlying colors that you painted in one of the first steps. As mentioned, if you want to make it more rustic, feel free to hand sand the sign along the edges. I was planning on doing this, but I ended up loving the end result so skipped the sanding!

And there you have it! A rustic farm-house style sign that reads Love Makes a House a Home!

Full Disclosure: Dixie Belle Paints sent products to facilitate this craft. As always, opinions on NKT are my own.